Welcome to the “Manage a Server” guide – your go-to reference for administrating and maintaining a server managed via EasyEngine. Whether you’re configuring server settings, performing maintenance, or troubleshooting, this page walks you through all core server-management tasks available in the Dashboard – without needing to drop into the command line.
Here you’ll learn how to:
- View and understand the server’s general configuration, network, and machine specifications.
- Monitor machine resources such as CPU, RAM, disk space, swap, OS, and kernel details.
- Perform administrative actions like transferring server ownership, rebooting, resynchronizing metadata, and decommissioning.
- Manage system-wide settings such as automatic updates, EasyEngine version upgrades, and firewall / SSL status.
- Safely decommission a server when it’s no longer required – with guidance on preventing data loss.
Use this documentation page as your central resource for everyday server administration tasks with EasyEngine.
Overview tab
The Overview tab is a read-only section providing essential technical and administrative information about your server.

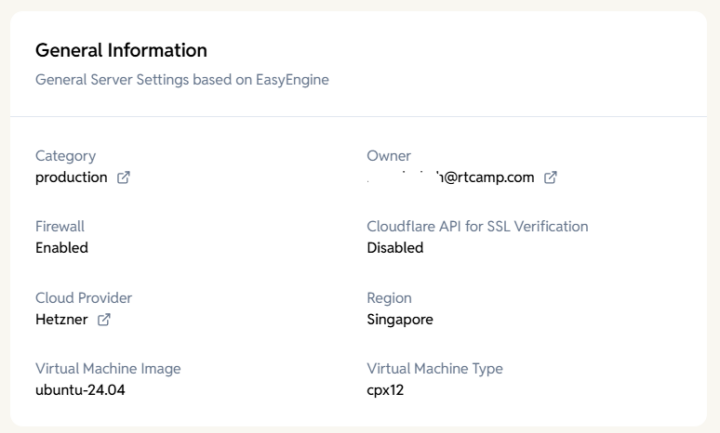
General Information
The General Information section displays key server details and configuration settings managed through EasyEngine. These values help you quickly understand the server’s status, environment, and enabled features.
- Category – Indicates the server’s classification (e.g., development, staging, production).
Example: development - Owner – Shows the email address of the user who currently owns and manages this server.
- Firewall – Displays whether the server’s firewall protection is enabled.
- Cloudflare API for SSL Verification – Indicates if Cloudflare DNS is configured for automatic SSL certificate verification and issuance. Example: Enabled
- Cloud Provider – Name of the cloud service provider hosting the server (e.g., AWS, DigitalOcean, Hetzner, Custom)
- Region – Geographic location or data centre region where the server is hosted (e.g., us-east-1), displayed only if Cloud Provider is not Custom
- Virtual Machine Image – Operating system image or template used to create the virtual machine (e.g., ubuntu-24.04), displayed only if Cloud Provider is not Custom
- Virtual Machine Type – Instance size or specification defining CPU, memory, and storage resources (e.g., cx22), displayed only if Cloud Provider is not Custom
- Public IPv4 – Shows the server’s public IP address used for DNS and external access.

Machine Information
The Machine Information section provides key details about the server’s hardware and operating system. These specifications help you understand the server’s capacity, performance capabilities, and environment configuration.
- CPU – Number of processor cores available on the server (e.g, 1, 2, 4)
- RAM – The total amount of physical memory available on the server, used for running applications and processes (e.g, 4 GB, 8 GB)
- Disk – The total storage capacity available on the server (e.g, 25 GB, 50 GB)
- Total Swap – The total amount of swap space configured on the server, used as virtual memory when RAM is fully utilized (e.g, 2 GB)
- Operating System – Name and version of the operating system installed on the server (e.g, Ubuntu 24.04.2 LTS)
- Kernel – Linux kernel version currently running on the server (e.g, 6.8.0-71-generic)

System Info
- EasyEngine – Installed EasyEngine version, a command-line tool for managing WordPress and Nginx-based sites
- Last Reboot – Date when the server was last restarted
- Timezone – The time zone currently configured on the server
- Docker – Installed Docker version, a platform for running applications in containers
- Docker Compose – Installed Docker Compose version, a tool for defining and running multi-container Docker applications
- Python – Installed Python version on the server
- Pending Updates – Number of available package updates that have not yet been installed
- Security Updates – Number of available security-related updates pending installation

Graphs tab
The Graphs tab displays charts to help users easily identify the peak usages, downtime, and average load. The time range can be adjusted by selecting the options from the dropdown menu in the top right corner
System Load Average
The average number of processes waiting to run over the last 1, 5, and 15 minutes, indicating server load

Disk Usage
The percentage of disk space used on the mounted volume, helping monitor storage capacity

CPU Usage
The percentage of CPU resources currently in use, showing processing load and spikes

Memory Usage
The amount of physical memory (RAM) currently used by the system, indicating memory consumption trends

Swap Usage
The percentage of swap space currently in use, acting as overflow when RAM is fully utilized.

Configuration tab
The Configuration tab contains all editable server settings.
Admin Actions
The Admin Actions section provides essential tools for managing and maintaining your server in the EasyEngine Dashboard. These actions allow you to transfer ownership, restart the server, refresh metadata, update EasyEngine, manage system updates, and decommission the server when required.

Each action is explained below.
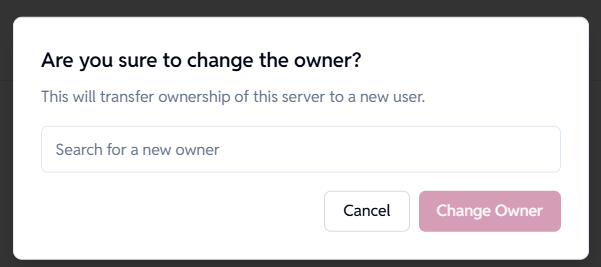
Transfer Ownership of the Server
Allows you to transfer the server’s ownership to another admin-level user in your organization.
How it works:
- Click Change Owner
- Search and select a new admin user
- Confirm the transfer
Important:
- Only admin users can be assigned server ownership
- Non-admin users will not appear in the search
Warning:
Transferring ownership gives complete control of the server to the new user.

Reboot the server
Restarts the server safely through the dashboard.
What happens:
- All running services briefly go offline
- Server becomes temporarily unavailable until fully restarted
When to use:
- After major configuration updates
- To resolve system-level issues
- When services are unresponsive
Action: Click Reboot.

Resync the server metadata
Refreshes and updates all stored information related to the server.
Updates include:
- Resource usage
- Installed packages/services
- Server configuration
- System status
When to use:
- After making changes directly on the server
- When dashboard information seems outdated
- After setup changes
Action: Click Resync.

Update EasyEngine to the latest version
Checks for and installs the latest EasyEngine release available for your server.
Dashboard Behavior:
- If up-to-date → Message: “Current EasyEngine X.X.X is up-to-date!”
- If a new version is available → The Update button becomes active
When to use:
- To fix bugs or improve stability
- To get new features
- To apply security patches

Weekly System Updates
Automatically installs OS-level system package upgrades on a weekly schedule.
Options:
- Enabled: System updates install automatically each week
- Disabled: You must update packages manually via terminal
When to enable:
- Production servers that require timely security patches
- Environments where you want minimal manual maintenance
When to disable:
- Systems requiring strict version control
- Setups where updates must be tested before being applied

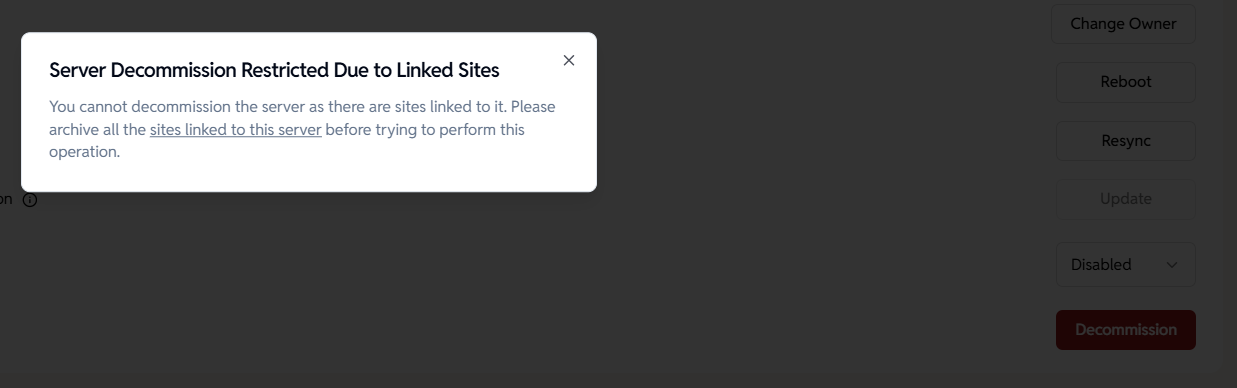
Remove This Server
Decommissioning permanently removes the server
Important:
You can only decommission a server if no sites are currently linked to it.
If sites still exist on the server, the dashboard will show:
Server Decommission Restricted Due to Linked Sites
You cannot decommission the server as there are sites linked to it. Please archive all the sites linked to this server before trying to perform this operation.
Action Required:
- Archive or delete all sites associated with the server.
- Return to the server page.
- Click Decommission again.
Once all linked sites are removed, the server can be safely decommissioned.

Cloudflare Integration for SSL Verification
Enables EasyEngine to issue and renew SSL certificates automatically using the Cloudflare DNS API.
What This Feature Does
- Automates Let’s Encrypt DNS verification
- Updates DNS challenge records through Cloudflare API (Creates required TXT records in Cloudflare).
- Works even when the server is behind Cloudflare’s proxy.
- Eliminates the need for manual DNS configuration.
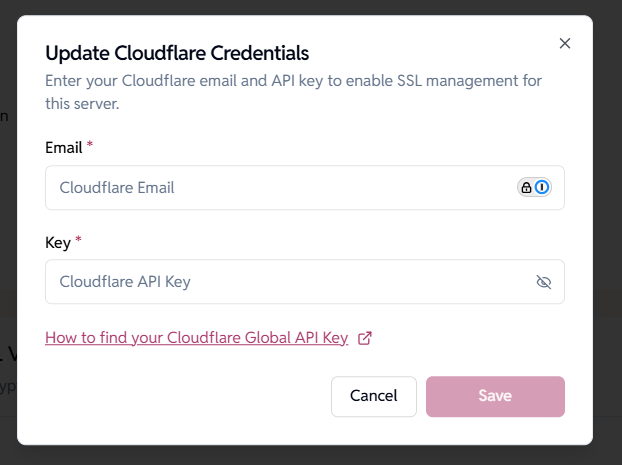
Update Cloudflare Credentials
To enable Cloudflare-based SSL management for this server, you must provide:
- Cloudflare Email
- Cloudflare Global API Key
These credentials allow EasyEngine to create and validate DNS challenge records required by Let’s Encrypt.
How to Update Credentials
- Click Update Cloudflare Credentials.
- Enter your Cloudflare account email.
- Enter your Global API Key.
- Click Save to activate Cloudflare integration.
Note:
You can toggle password visibility to verify your API key before saving.
Need help finding your Global API Key?
Click the link “How to find your Cloudflare Global API Key” for step-by-step instructions.
Remove Cloudflare Credentials
If you no longer want EasyEngine to manage DNS for SSL:
- Click Remove Cloudflare Credentials.
- This disables Cloudflare-based SSL verification for the server.
Important:
Removing Cloudflare API credentials may affect SSL renewals if DNS verification is required.

Randomised HTTP Auth
- If this setting is enabled, HTTP Auth will be randomised for sites created on the server.
- If this setting is off, users can add a fixed username and password for the site created on the server


Firewall tab
The Firewall feature helps secure your server by blocking malicious traffic and managing IP-level access. You can enable or disable it under each server’s Firewall tab.

Firewall Overview
Once enabled, the firewall automatically protects your server from suspicious or unwanted traffic.
You can manually manage access by adding Whitelisted, Blacklisted, or reviewing Auto-Banned IPs.
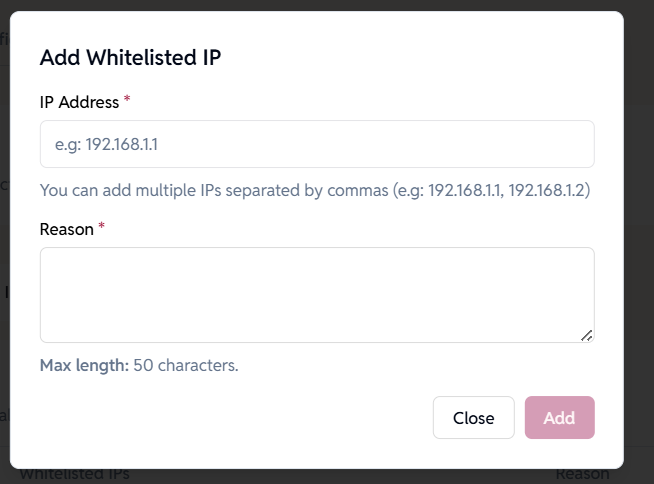
Whitelisted IPs
Whitelisted IPs are allowed to bypass firewall restrictions. These IPs always take priority over both blacklisted and auto-banned entries.
How to Add Whitelisted IPs
- Click Add New under the Whitelisted IPs section.
- Enter one or more IP addresses (comma-separated).
- Example: 192.168.1.1, 192.168.1.2
- Add a short reason (max. 50 characters).
- Click Add to save.
You can later edit or remove whitelisted IPs as needed.
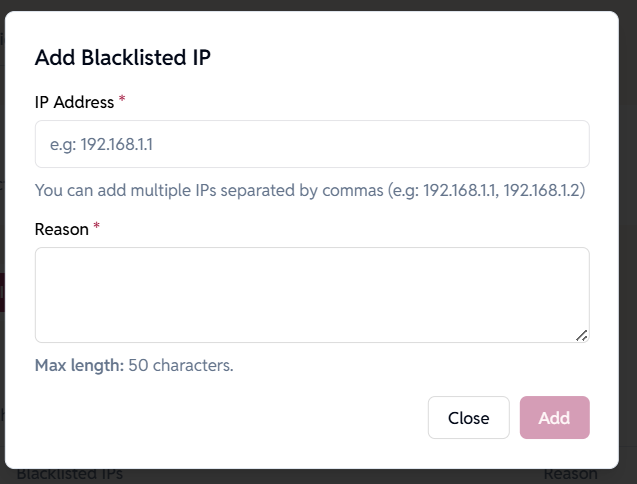
Blacklisted IPs
Blacklisted IPs are permanently blocked from accessing your server.
Whitelisted IPs will always override blacklisted entries.
How to Add Blacklisted IPs
- Click Add New under the Blacklisted IPs section.
- Enter the IP address(es) you want to block.
- Provide a reason (max 50 characters).
- Click Add to save.
You can manage, update, or delete blacklisted IPs at any time.
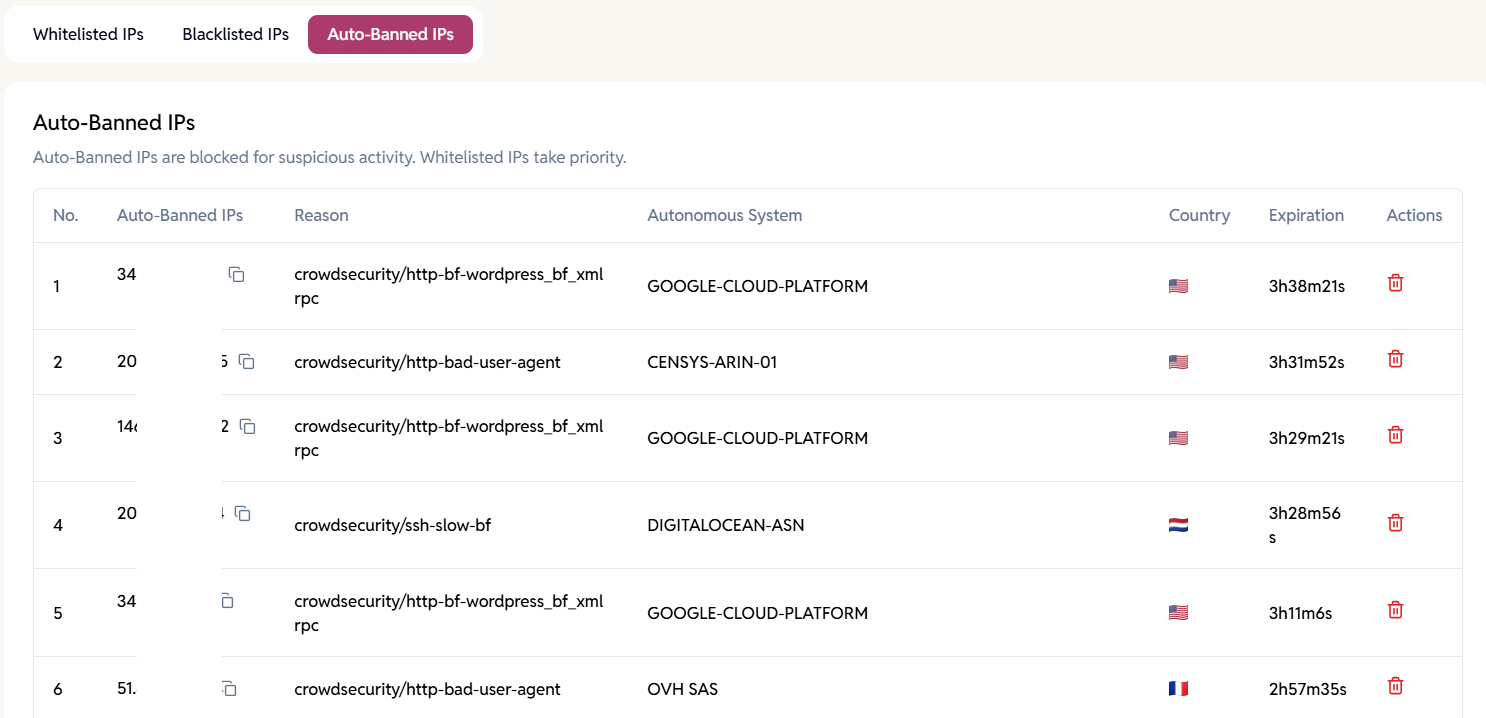
Auto-Banned IPs
Auto-banned IPs are temporarily blocked due to suspicious activity such as repeated failed login attempts or unusual request patterns.
Information shown related to a banned IP include:
- IP Address
- Reason for Ban
- Autonomous System (AS)
- Country
- Expiration Time
Whitelisted IPs are exempt from automatic bans.
SSH tab
The SSH tab allows you to manage SSH access for users.
- By default, the SSH keys existing for the organization are added for all the new servers.
- New SSH keys can be added to provide SSH access to the server
- The existing SSH keys can be removed to remove access to the server
- An optional comment field can be added to help identify or keep track of the user’s SSH keys


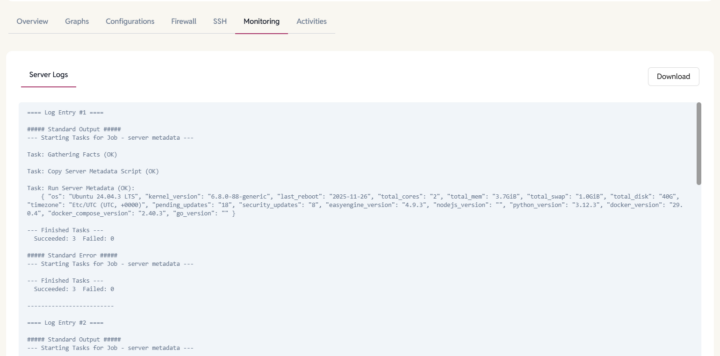
Monitoring tab
The Monitoring tab provides logs that show the operational history of your server, helping you troubleshoot issues and track changes.
- Server Logs – Server logs showing actions performed, when they started and ended, and any failed operations.
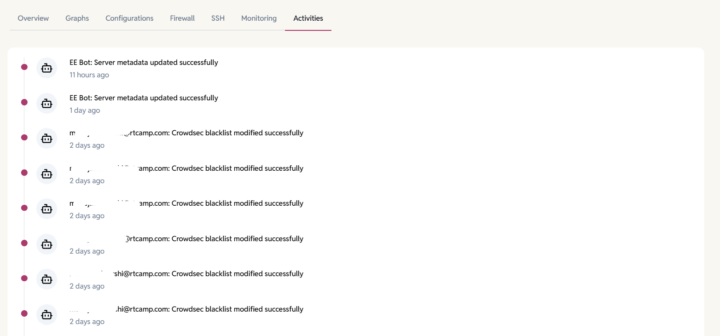
Activities tab
The Activities tab tracks all actions that were performed on your server, helping you understand what changes were made, when, and by whom.
- Timeline of server-related activities.
- Details on which user updated server metadata, SSH access, etc.
- Complete change history for better transparency.