
EasyEngine Dashboard now adds a server to your organization only after it finds your organization’s key in a root-only file on that server. Before this change, the check proved the Dashboard could reach a server, not that your organization controlled it. That left a short window in which someone outside your organization could claim a server you were partway through importing.
Only someone with root on the server can give that proof. To give it, run your organization’s verification command on the server as root before you import it. Servers already in your organization need nothing, and neither do new servers the Dashboard provisions on AWS, DigitalOcean or Hetzner.
The same update gives email-and-password sign-ups a clean start when the address is verified.
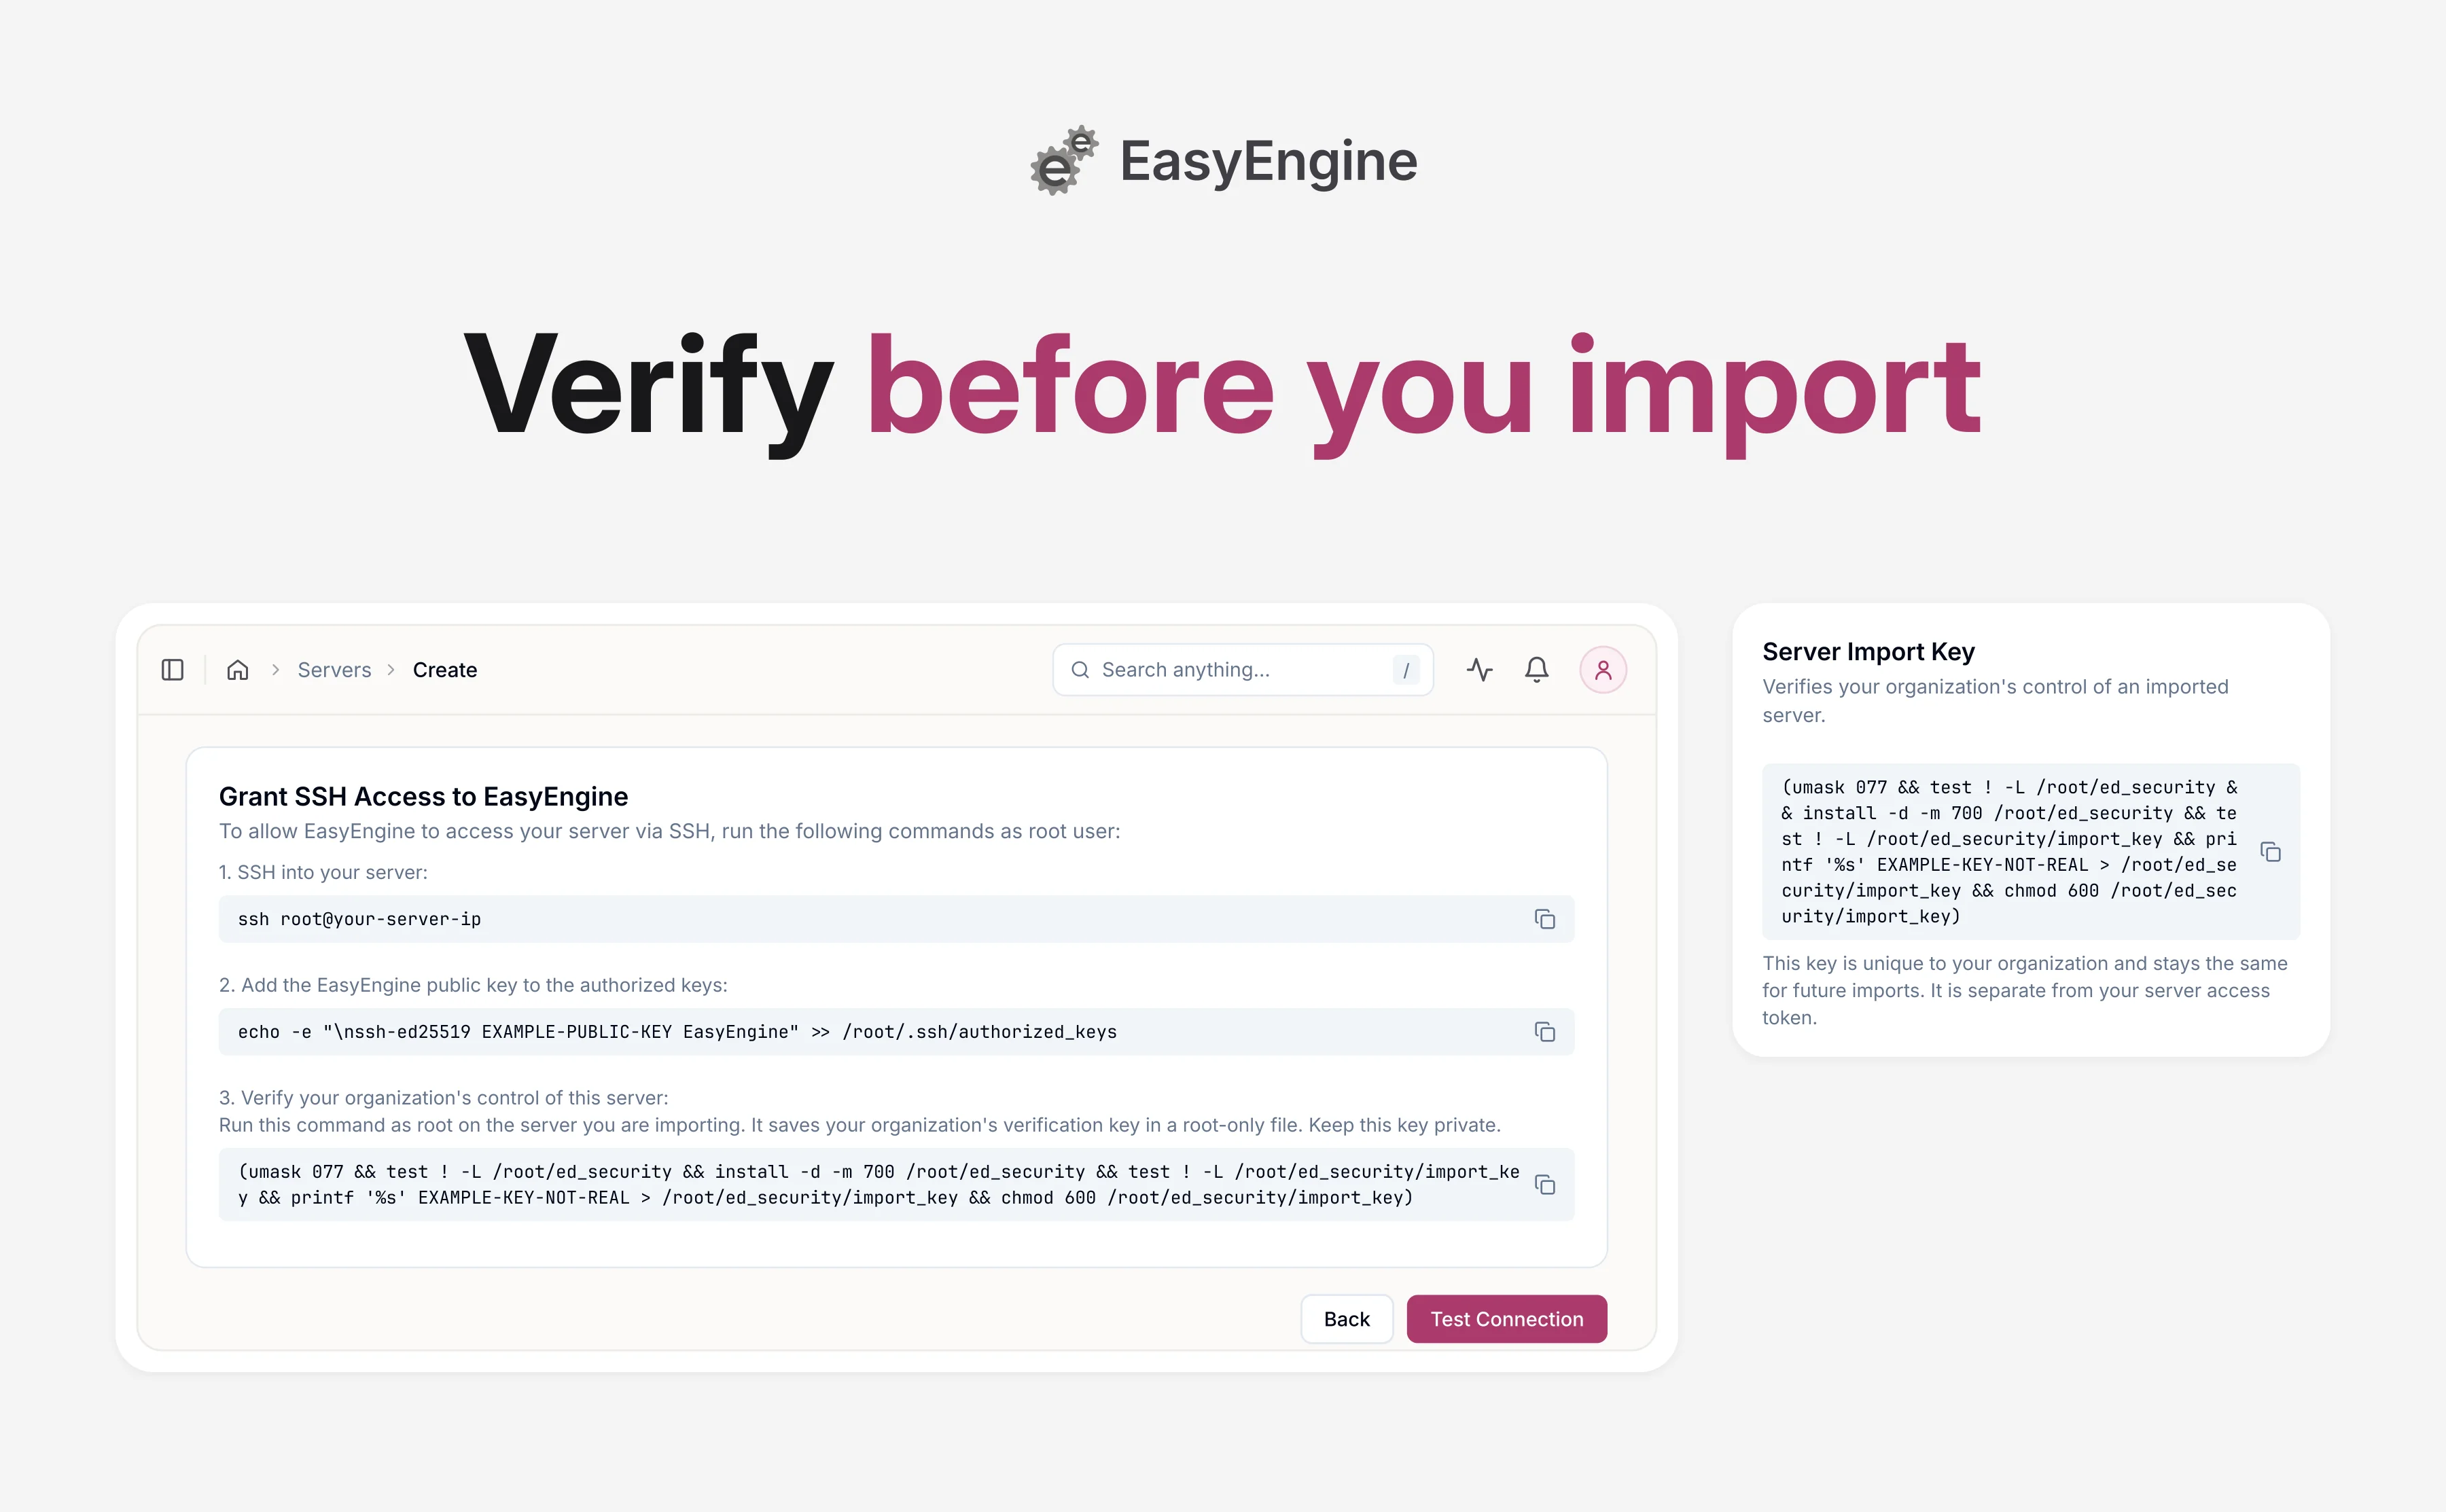
Why a root-only key shows you control a server
The verification command writes your organization’s key to /root/ed_security/import_key, a root-only file in a folder only root can open. The Dashboard reads it over SSH when you click Test Connection and again when you submit the server.
A missing or wrong key keeps the server out. Each organization has one key, used for every server you import.
Prove control on your next import
Only organization owners and admins can import servers, and only they see the verification command.
- On the Servers page, click Add New (Connect Server when the list is empty), choose Existing Server and click Next.
- On the Grant SSH Access to EasyEngine card, complete step 2 by adding the EasyEngine public key.
- In step 3, Verify your organization’s control of this server, copy the command and run it on the server as root, whether or not EasyEngine is already installed. Paste it exactly as shown, because the Dashboard checks the key plus the file’s owner, permissions and length.
- Click Test Connection, then submit the server.
Your account starts clean when you verify your email
When you sign up with an email and password, verifying the address gives your account a clean start. No password or session from before you proved the address was yours carries over: the link takes you straight to Update Password to choose yours. Until then, the account can sign in and resend the link, and nothing else.
Signing in with Google using the same address also verifies the account, with the same clean start. Google is then your sign-in. If you want a password too, set one from Forgot password? on the sign-in page.
Accounts that are already verified, including those created with Google or through an invitation, see no change.
What else is in this security update
This update closes 26 issues found in an internal security review of the Dashboard, including the changes above. A few show up as you work:
- White-label email: on the Whitelabel page’s Email tab, changing the SMTP Server asks you to enter the Password again. The SMTP Server must be a domain name that resolves to a public address.
- Backup bucket keys: when you change the bucket settings on the Backup Providers tab in Settings, the Dashboard checks Bucket Access Key and Bucket Secret Key for invalid characters before saving. Keys as storage providers issue them, including ones with
/,+or=, still work. - SSH connectivity checks: Test Connection allows 5 SSH checks a minute during an import. Past that, the Dashboard asks you to try again in a minute.
Access to organization data, plans and checkout is also scoped more tightly. Administrative settings and plan setup now return a permission error to accounts without admin rights. Normal use is unaffected.
Get started with server import verification
Everything in this post is available to all users, and the check starts with the next server you import. What to do depends on your role:
- Agencies that script server builds: bake the verification command into the build, pulling it from your secret store rather than the repository, so every server is ready when you import it from the Dashboard.
- Organization owners and admins: copy the command from the Server Import Key card on the Auth tab in Settings, or from step 3 of the import form. Run it on the server as root before Test Connection, and keep the key private.
- Everyone else: nothing to do.
If you’d like a hand, our team is glad to walk you through it.
Frequently asked questions
Do I need to do anything for servers already in EasyEngine Dashboard?
No. The Dashboard checks for your organization’s key only when you import a server: at Test Connection and again when you submit it. Servers that are already connected keep working without the command, and so do new servers the Dashboard provisions on AWS, DigitalOcean or Hetzner.
Who can see the verification command?
Organization owners and admins can. They find it in step 3 of the server import form and on the Server Import Key card of the Auth tab in Settings. Managers and members can’t import servers and don’t see the card.
What does the server ownership verification error mean?
The Dashboard couldn’t read or match your organization’s key at /root/ed_security/import_key. The error also appears when the EasyEngine public key from step 2 isn’t on the server yet.
Check the public key first, then run the verification command as root exactly as shown and try again. The full message reads “Server ownership verification failed. Run this organization’s verification command on the server as root, then try again.”
Links: Import an Existing Ubuntu Server | EasyEngine Dashboard Features | Open a support ticket
On this page
Leave a Reply