Secure your servers with built-in firewall controls
Block malicious traffic, whitelist trusted IPs, and monitor auto-bans all from your EasyEngine Dashboard.
Key Highlights
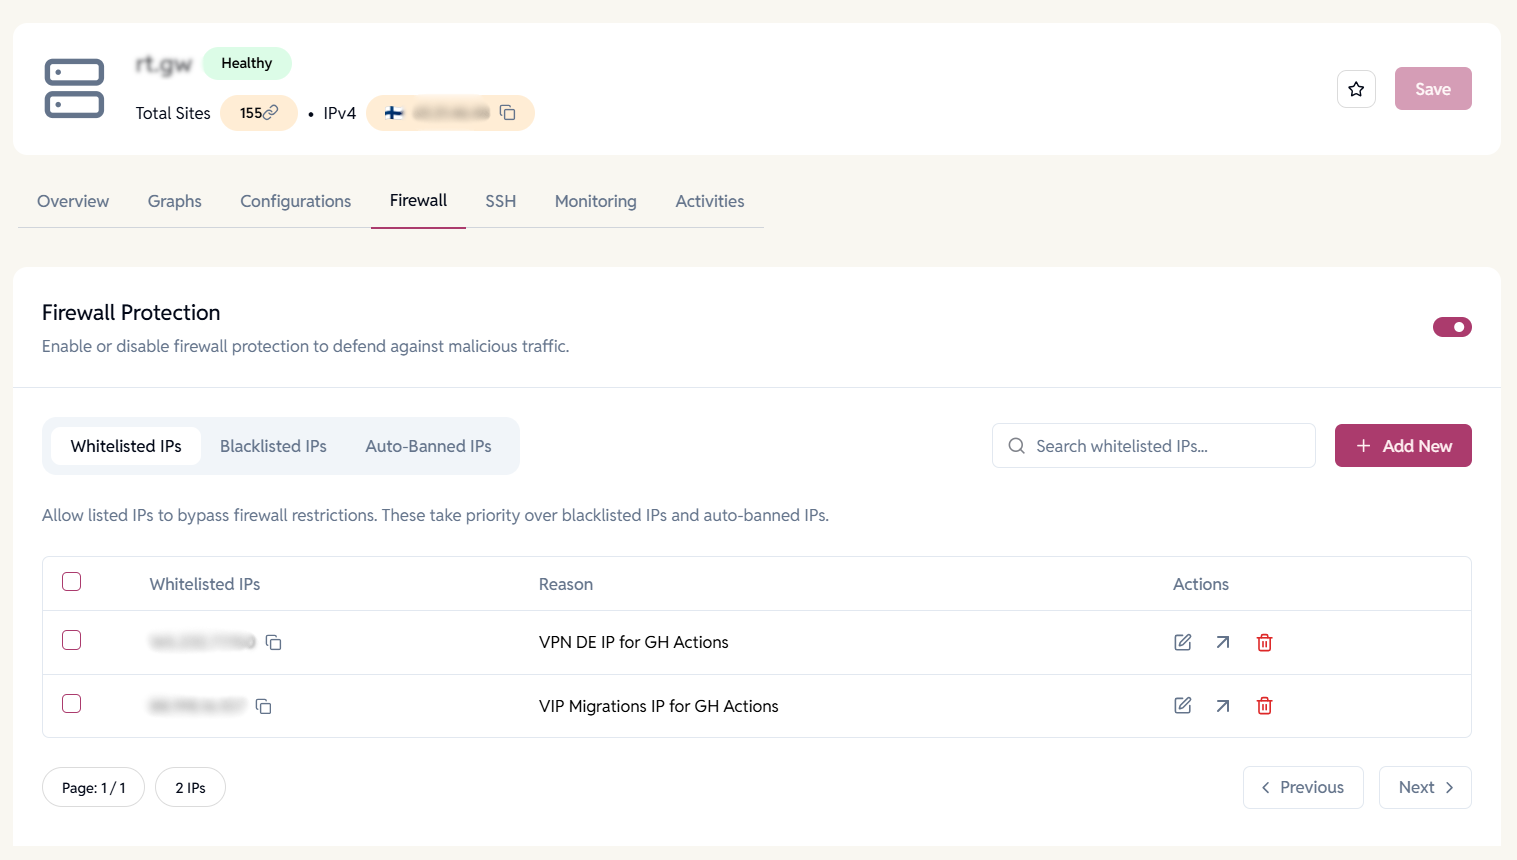
Whitelisted IPs
Add trusted IPs that always bypass firewall rules.
Lowest priority for blocking; ensures your team, internal tools, and partner systems stay connected.
Blacklisted IPs
Block known bad IPs proactively (bots, proxies, suspicious sources).
Whitelisted entries always override any blacklist to prevent false blocks.
Auto-Banned IPs
Automatically blocks IPs exhibiting suspicious behaviour (failed logins, XML-RPC abuse, crawler flood).
View and manage auto-bans: IP Address, Reason, ASN, Country, Expiration.
Server-Level Control
Enable or disable the firewall per server from the Dashboard.
Fully managed through the UI.
How it works
1
Navigate to Servers
Select a Server → Firewall tab. Toggle Enable Firewall Protection.
2
Add IP Addresses
Add trusted addresses under Whitelisted IPs (comma-separated). Block bad addresses under Blacklisted IPs.
3
Monitor Auto-Banned IPs
View the Auto-Banned IPs list for automatically detected threats or Unban an IP.
Firewall Protection
Defend your servers and sites from malicious traffic.
Enable a built-in firewall to automatically detect, block, and control suspicious activity on your infrastructure.
- Toggle the firewall at the server level to secure all WordPress sites hosted on that machine.
- Real-time IP monitoring and actions.
- Whitelist trusted IPs for uninterrupted access.
- Blacklist known threats and risky networks.
- Centralized control for all hosted sites.
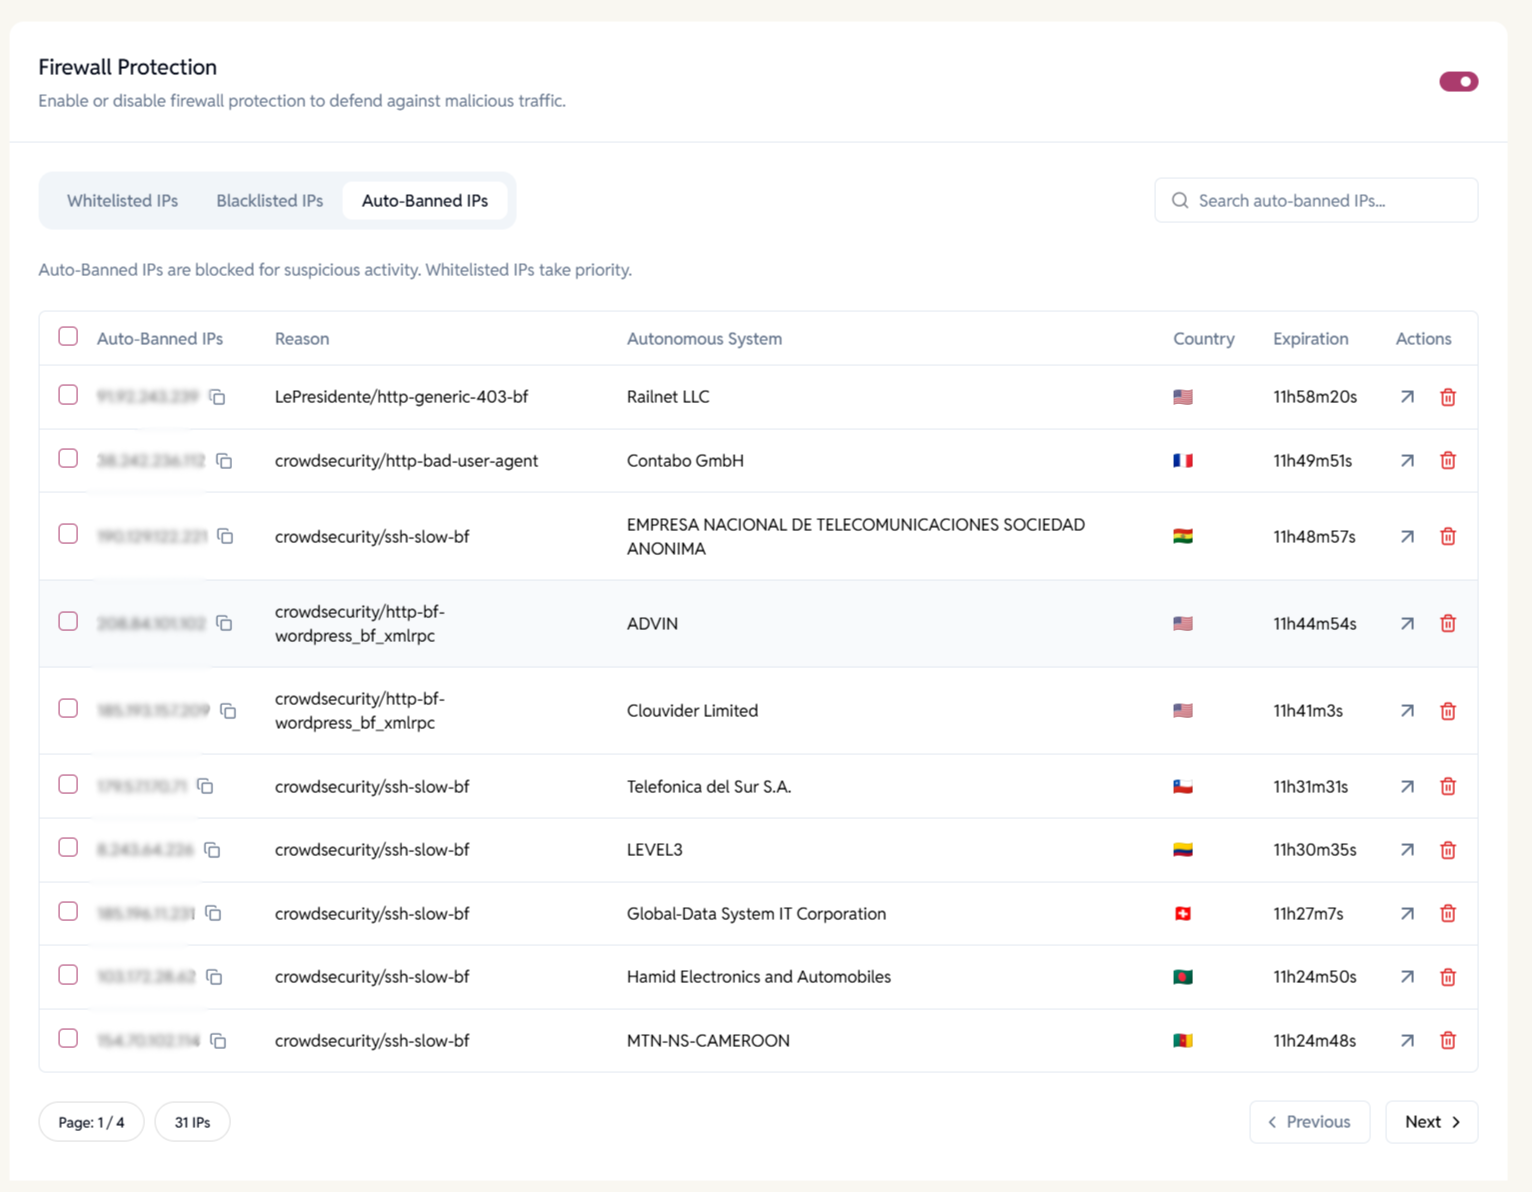
Auto-Banned IPs
Block threats automatically.
Suspicious IPs are detected and banned in real time based on behavior patterns like brute force, bad user agents, and abnormal request rates.
- Automatic threat detection.
- View ban reason and source network.
- Track country and expiration time.
- Remove or allow IPs instantly.
FAQ
Have more questions?
You can add multiple IP addresses in comma-separated format.
Check the Auto-Banned IPs list → reason → consider whitelisting if it was a false positive.
Yes – simply add it under Whitelisted IPs to bypass firewall rules, even if it gets auto-banned.
No. The firewall works at the server level – independent of WordPress plugins.
Firewall protection is enabled per server.