In this tutorial we will show you how to configure CDN on cdn.net with W3 TOTAL CACHE.
Configuring CDN on your WordPress is really easy with some simple steps:
- Go to cdn.net and login there.
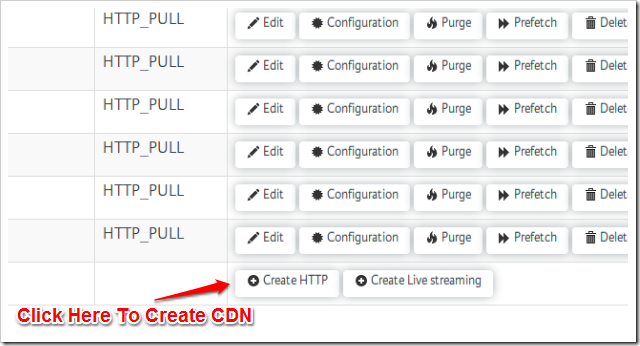
- Click on create HTTP.
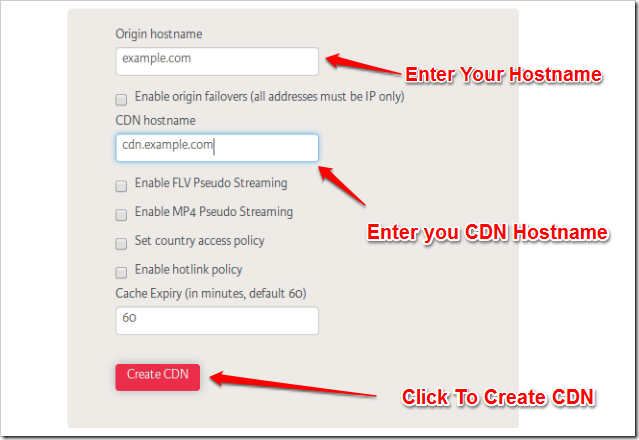
- Under Original hostname section, enter your hostname where you want to configure CDN.
- Under CDN hostname section, enter CDN hostname e.g. cdn.example.com (You can choose any name of your choice).
- Leave everything else as it is and click on Create CDN.
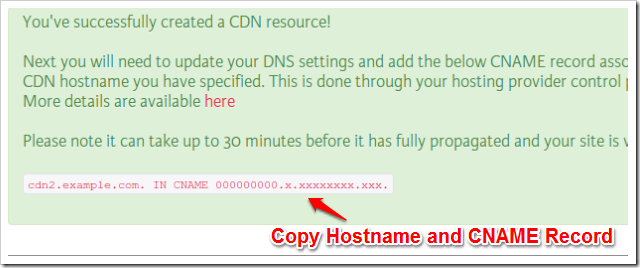
- Now you will get success message for creating CDN and you can see the CNAME record on the bottom of the message, please copy your CDN hostname and CNAME Record for further use.
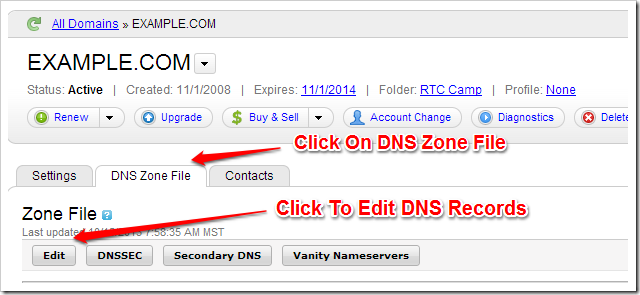
- Go to domain registration account where your website is registered (We are taking example of GODADDY).
- Go to DNS Zone file, click on Edit button.
- Under CNAME section click on Quick Edit.
- Add cdn hostname under Host Section and add CNAME Record (that you copied while creating CDN) under Points to Section.

- Now go to your WordPress Website’s admin page and then go to W3 TOTAL CACHE General Settings.
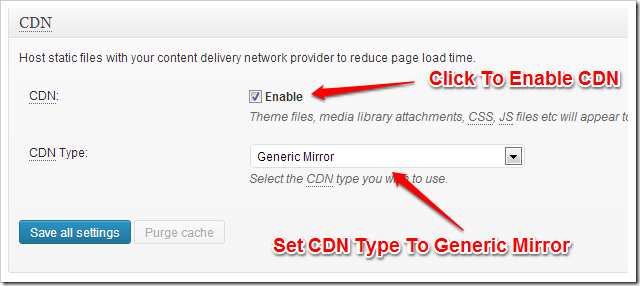
- Under CDN Section Click on Enable checkbox and set CDN Type to Generic Mirror.
- Now Go to Performance > CDN and add your CDN Hostname there.
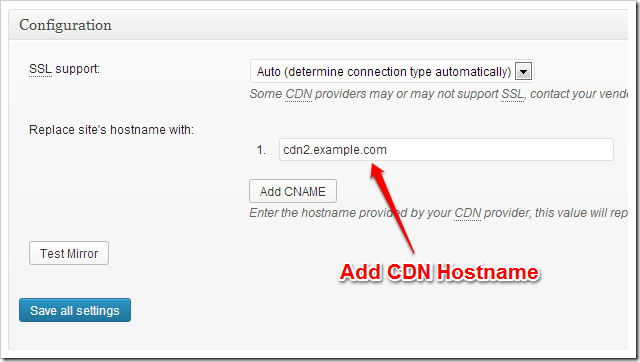
- Click on Save settings.
Now you have configured CDN on CDN.NET with W3 Total Cache.

6. Now you will get success “massage”
Yes!!! I do need a massage after setting up my cdn. Thank you for all the help.
It was typo from author. Fixed it. Thanks for reporting it. 🙂